Complete Feature Guide
🏷️ Create & Manage Custom Tags
Build your own tag system that matches how you think about music. Create categories (like "Mood"), subcategories (like "Energy Level"), and individual tags (like "Chill," "Energetic," "Melancholic").
What You Can Do:
- Create unlimited tags: Mood, genre, activity, energy, vibe, context—organize any way you want
- Nested hierarchies: Electronic → House → Deep House (three levels deep)
- Color coding: Assign colors to tags for visual organization
- Drag and drop: Reorganize your tag structure easily
Mood: Chill, Energetic, Melancholic
Activity: Workout, Study, Party, Commute
Genre: Electronic → House, Rock → Indie Rock
Context: Morning, Night, Rainy Day, Road Trip
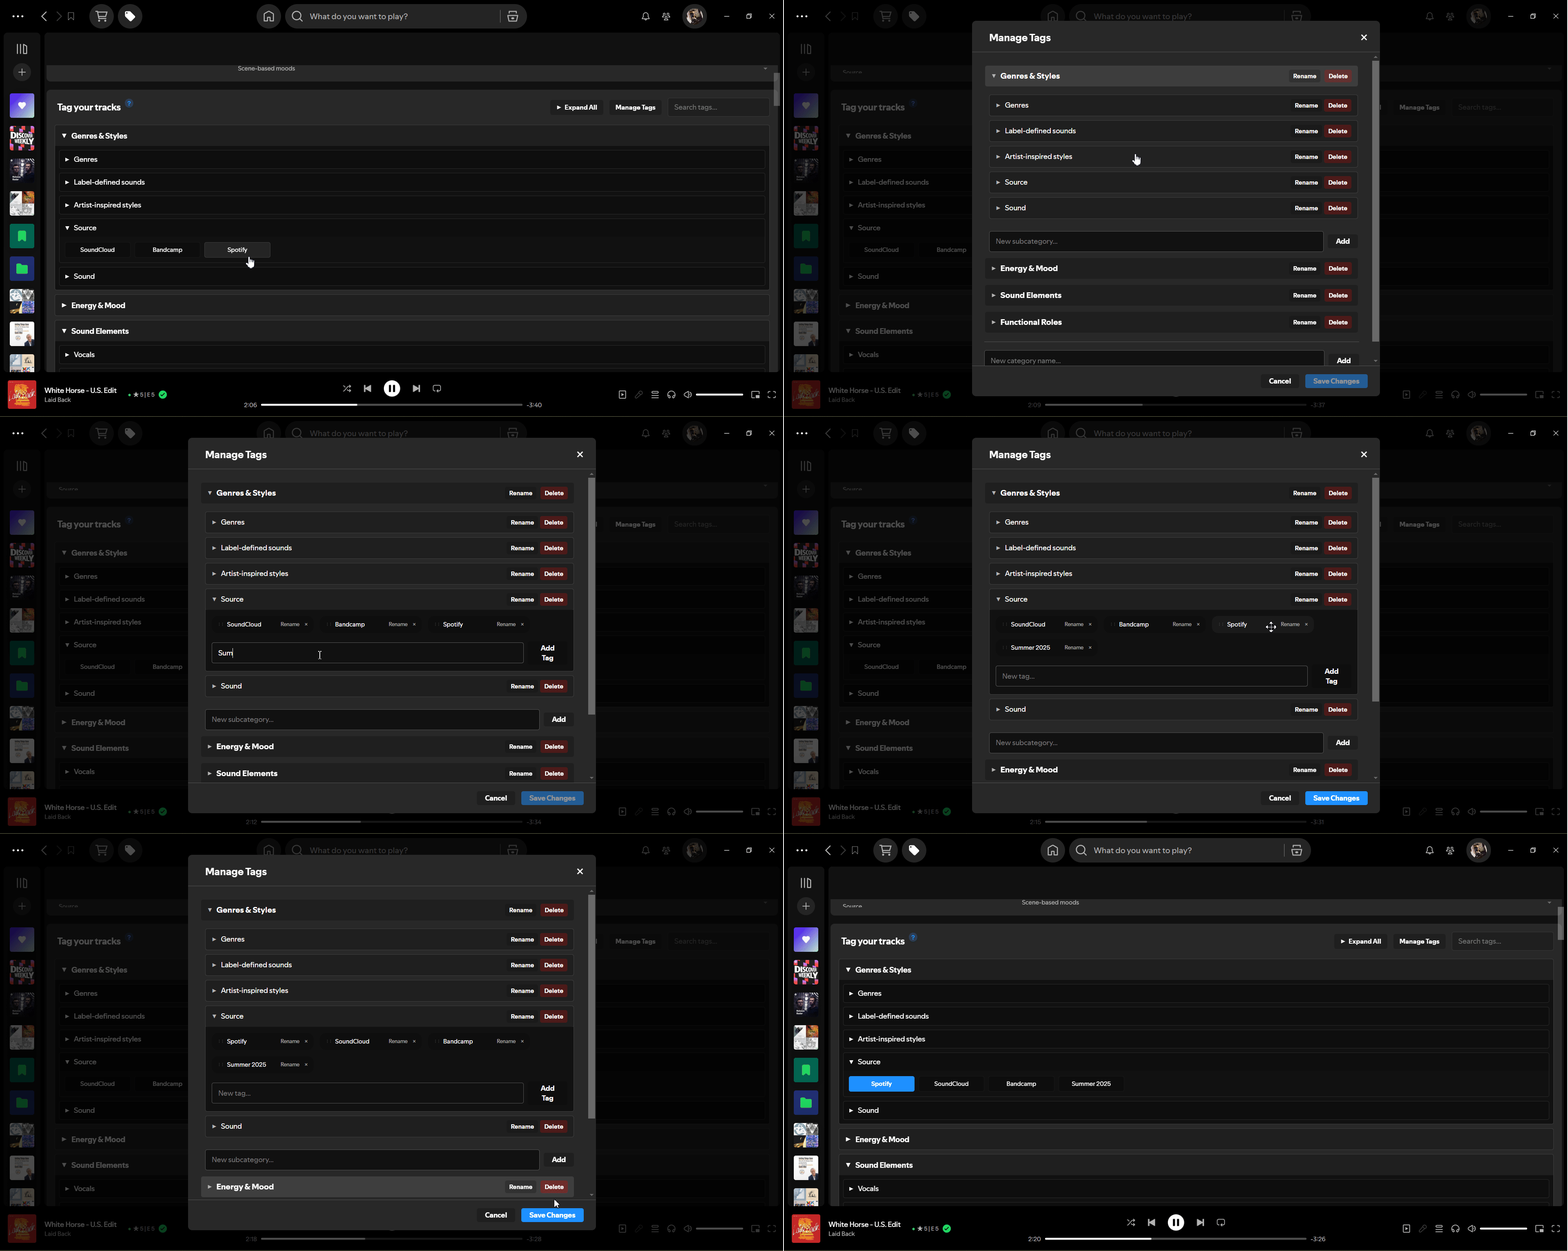
Creating custom tag categories and tags
⭐ Tag, Rate & Set Energy Levels
For any track, set star ratings (1-5), energy levels (1-10), and apply your custom tags. Tag songs as you listen, or use bulk tagging to handle multiple tracks at once.
What You Can Do:
- Star ratings: 1-5 stars (0.5 increments) to rate your favorites
- Energy levels: 1-10 scale for track intensity
- Multiple tags per track: Apply as many tags as needed
- Quick tagging: Tag the currently playing track or right-click any track
- Keyboard shortcuts: 1-0 for star ratings, Shift+1-0 for energy
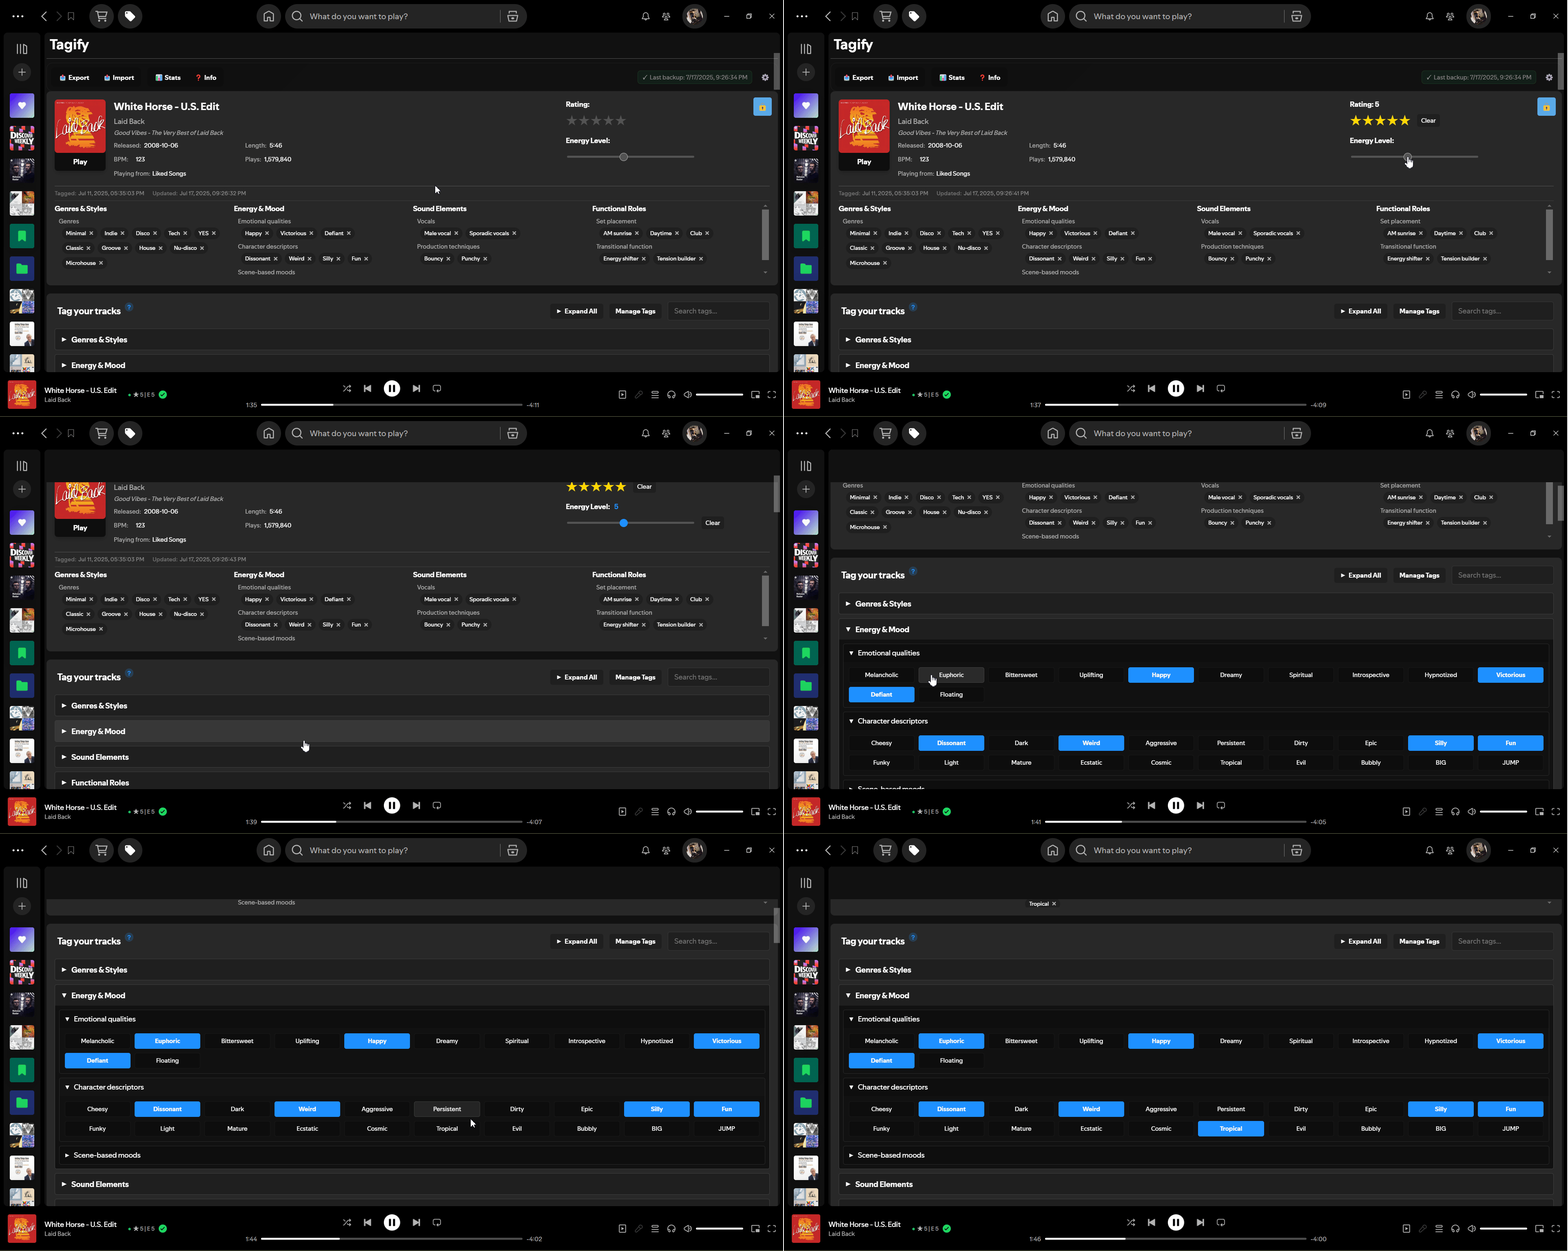
Tagging a track with ratings and custom tags
📦 Bulk Tag Multiple Tracks
Select multiple tracks in any Spotify playlist and tag them all at once. Perfect for organizing entire albums or playlists quickly.
What You Can Do:
- Select multiple tracks: Use Ctrl+A (Cmd+A on Mac) to select all, or Ctrl+Click for specific tracks
- Bulk tag interface: Right-click selected tracks → "Bulk Tag"
- Apply ratings & tags to all: Set star ratings, energy levels, and tags for entire selection
- Lock individual tracks: Lock specific tracks to set unique ratings/tags while bulk editing others
- Save with Ctrl+Shift+S: Quick keyboard shortcut to save changes
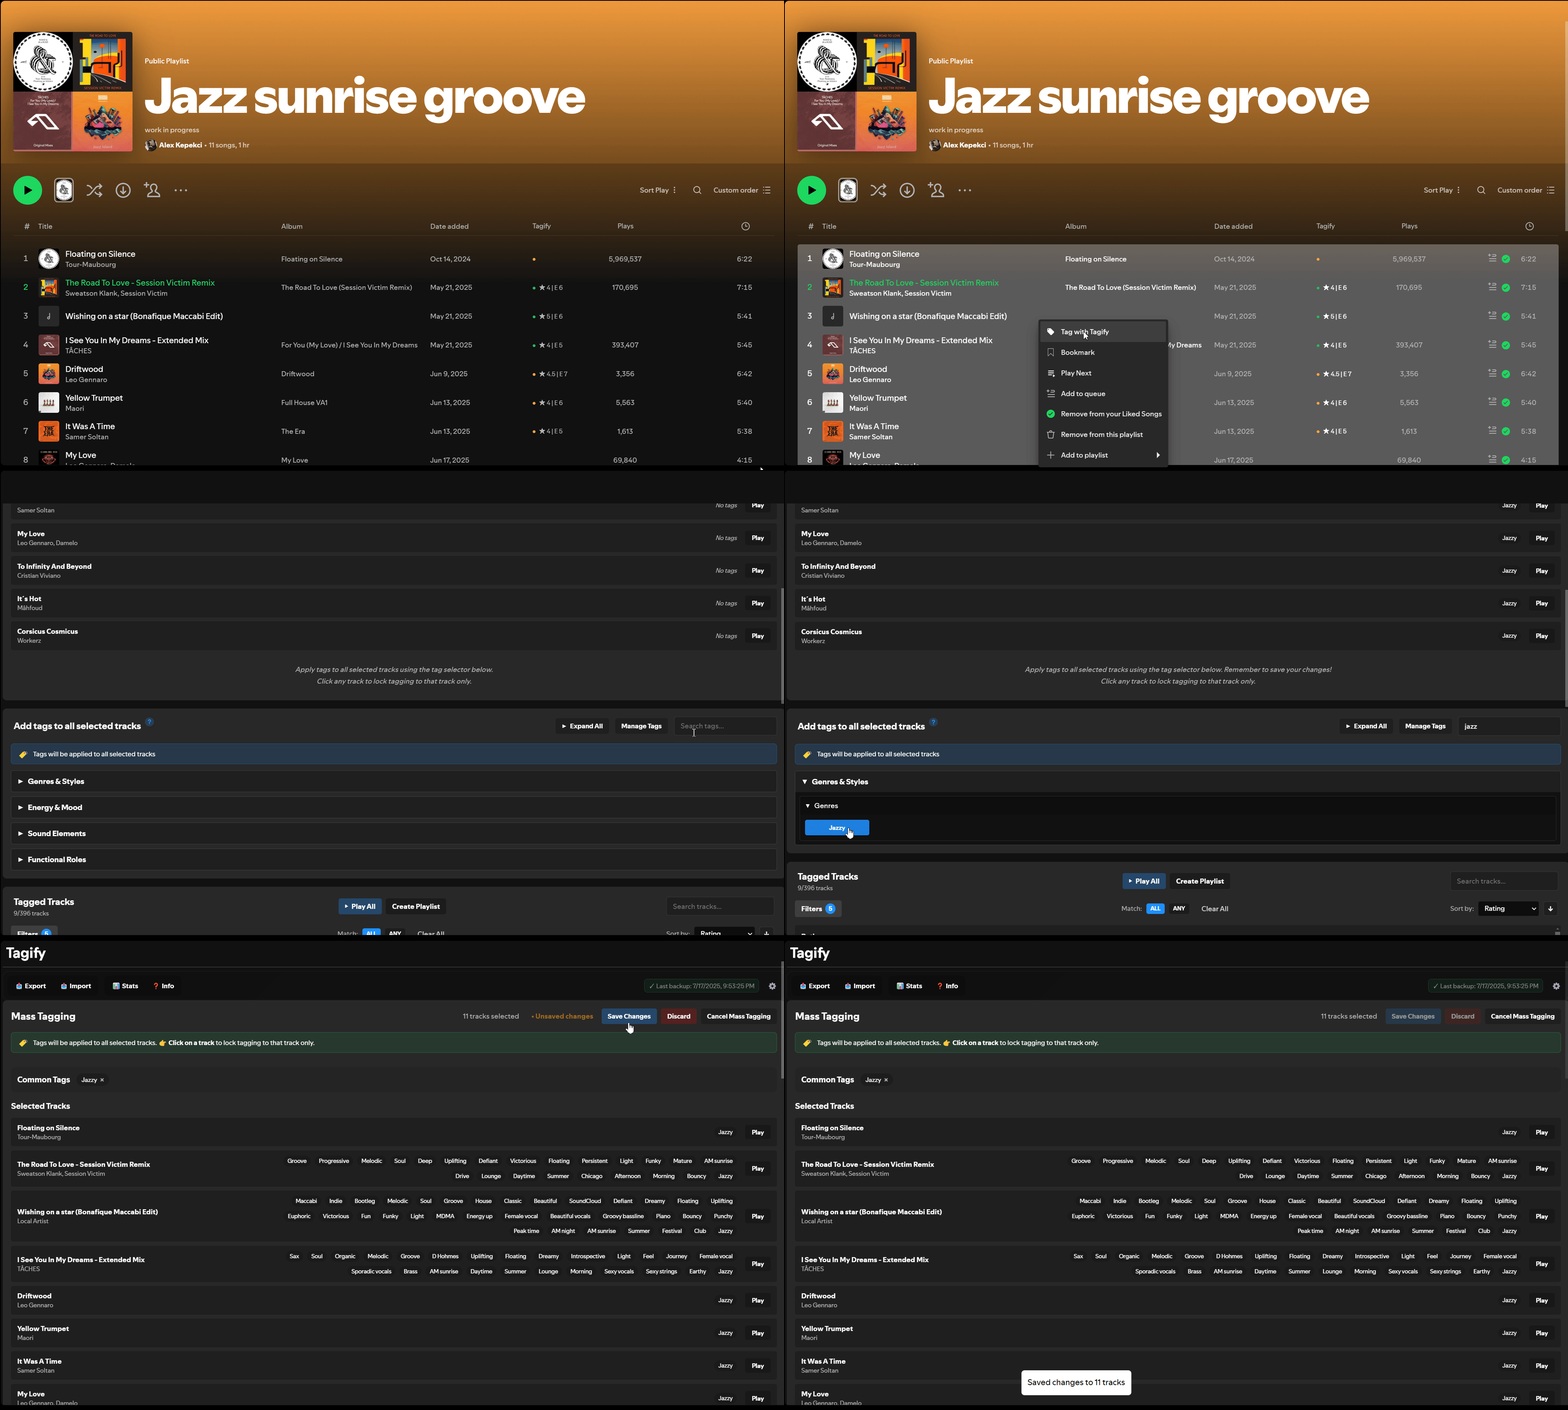
Selecting and bulk tagging multiple tracks
🔍 Smart Filtering & Playlist Creation
Filter your entire library by any combination of tags, ratings, energy levels, and BPM ranges. Then create Spotify playlists from your filtered results—or make them "smart" so they auto-update forever.
What You Can Do:
- Include/Exclude tags: Click tags once to include, twice to exclude
- Filter logic: "ALL" mode (tracks must have all selected tags) or "ANY" mode (tracks need at least one tag)
- Star rating filters: Show only 4-5 star tracks, or any range you want
- Energy level filters: Filter by intensity (1-10 scale)
- BPM ranges: Create tempo-specific playlists (e.g., 120-140 BPM for workouts)
- Create Playlist: Generate a Spotify playlist from filtered results
- Smart Playlists: Auto-updating playlists that add new songs when they match your criteria
- Play All: Start listening to filtered results immediately
Find all 4-5 star tracks tagged "Chill" + "Electronic", exclude "Vocals", BPM 80-110, energy level 3-6
→ Perfect focus music playlist
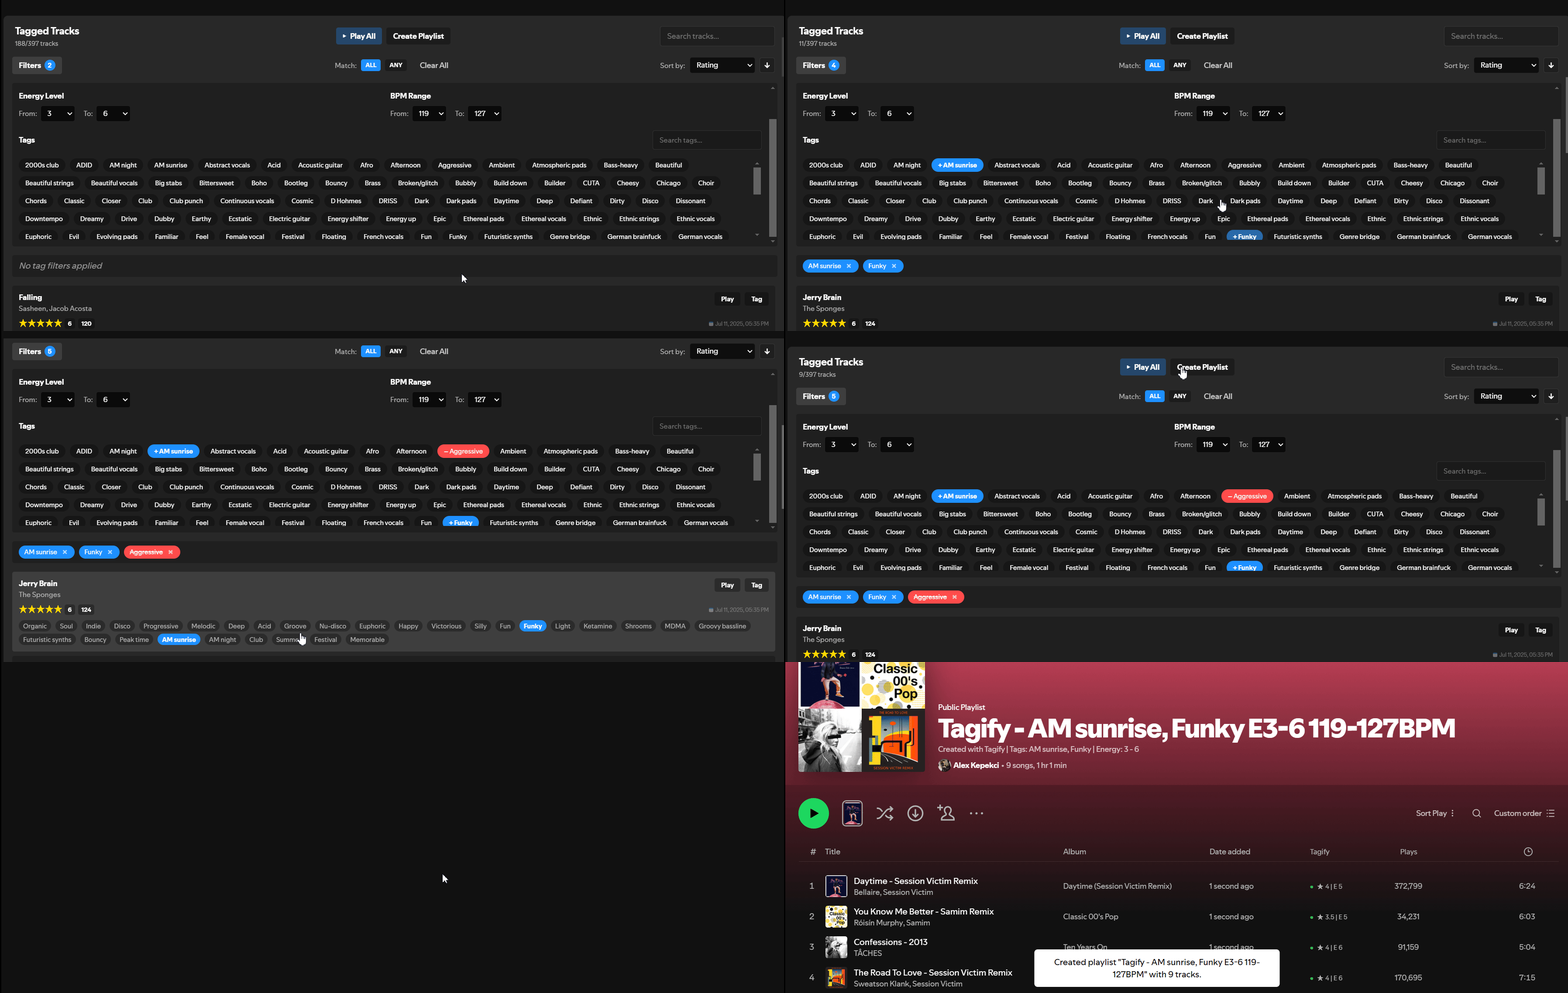
Filtering tracks and creating playlists from results
🧠 Smart Playlists (Auto-Updating)
The killer feature. Create playlists that automatically update when new songs match your criteria. Set your filters once, and every future track you tag that matches gets added automatically—forever.
How It Works:
- Step 1: Set your criteria (tags, ratings, energy, BPM)
- Step 2: Create a Smart Playlist with those filters
- Step 3: Tag new music as you discover it
- Magic: New songs that match your criteria automatically get added to the playlist
Create a Smart Playlist: 5 stars + Funky + Dance + Daytime + No Vocals
→ Every future 5-star funky dance track with no vocals automatically appears in this playlist
→ No manual playlist management, ever
Smart playlists update themselves automatically when new songs match your criteria
🎯 Additional Tools
Tagify includes several other helpful features for music organization.
Other Tools:
- BPM Management: Edit BPM values manually or refresh from Spotify's audio analysis
- Track Locking: Lock to a specific track to prevent auto-switching during tagging sessions
- Visual Indicators: See track tag status at a glance (orange = untagged, green = tagged)
- Export/Import: Backup your tag data and smart playlist configurations as JSON files
- Keyboard Shortcuts: Fast tagging with number keys (1-0 for stars, Shift+1-0 for energy)
Additional tools to streamline your music organization workflow